
I don’t know about you but I have A LOT of different logins on various websites, both personal and work. Logging into a bunch of different websites within a day can be overwhelming and can sometimes cause me to be forgetful of remembering to do things. In this post we are going to explain step-by-step on how to integrate your domain email to Gmail. Majority of us check our emails throughout the day. Integrating all of our emails into one place will make things just a little more easy and convenient.
Please note that we are going to use Hostgator as the domain hosting for this tutorial. If you are hosting your domain through a different provider (GoDaddy, Bluehost, Ipage, InMotionHosting ect), than the domain email to Gmail integration will vary.
Connecting Your Domain Email To Gmail
So, you have your domain name all set up. Now, you just want to find a way where you can set up your domain email and access it easily. What better way than to access all your emails in one place! Below is the first part of the guide, explaining how to create the domain email on your hosting provider. We will be adding this domain email to Gmail later!
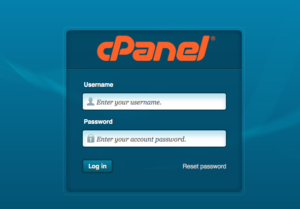
Log Into The Control Panel Of Your Hosting Account
Once you purchase the hosting for your domain name, you will receive an email with the login link to your control panel (c-panel). On the left, you will see a snapshot of our control panel through Hostgator.
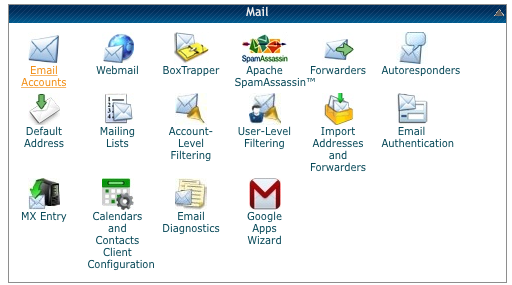
Control Panel Email Section
Once you log-in the control panel, there will be a “Mail” section: click on “Email Accounts.”
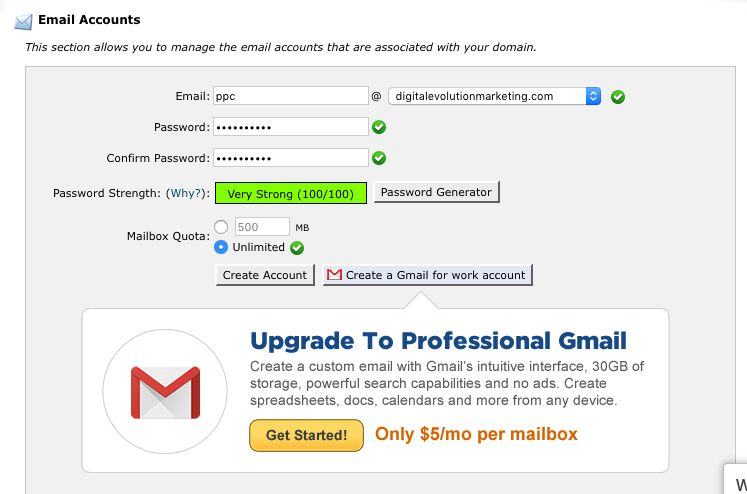
After you are done setting up your new email and password, click on “Create Account.” You do not have to click on “Create A Gmail For Work Account” as this tutorial will set it up for you, for FREE!
Okay, so domain email has been created and now we move to our Gmail. As we are now transitioning to the Gmail, keep your control panel open in a different window; we will need to get back to this a couple more times in this domain email to gmail integration!
Log Into Gmail
Once your are logged into your Gmail account, complete the following steps to add your domain email.
Tools & Settings Section
- At the far right side of your screen, click on the “Tools” icons, following the “Settings” link.

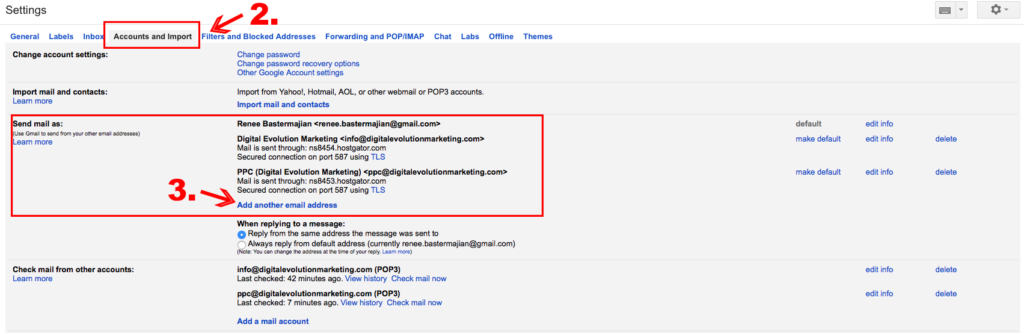
- Once you are in the “Settings” section, click on “Accounts and Import.”
- Under “Accounts and Import,” there is a subsection called “Send Mail As.” Click on “Add Another Email Address.”
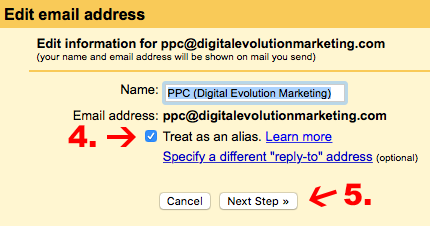
- Fill out the name, email address and keep the box below (“Treat As An Alias”) checked.
- Click on “Next Step.”
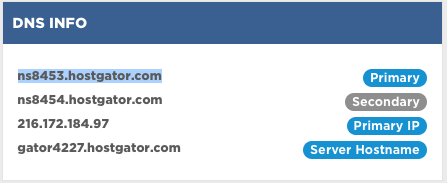
- Fill out your “SMTP Server.” This is when you are going to need to first go back to your domain Control Panel. Go to the home screen and go to the section that says “Server Info.” Copy the “Primary” address listed under “DNS Info.”
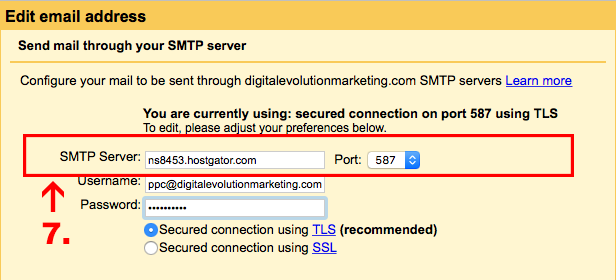
- Go back to the Gmail. Paste the address that was copied into the “SMTP Server” line. The port will be “587.” Enter your domain email as the user name and the password you initially created earlier in the control panel. Check the box, “Secured Connection Using TLS,” then click “Add Account.
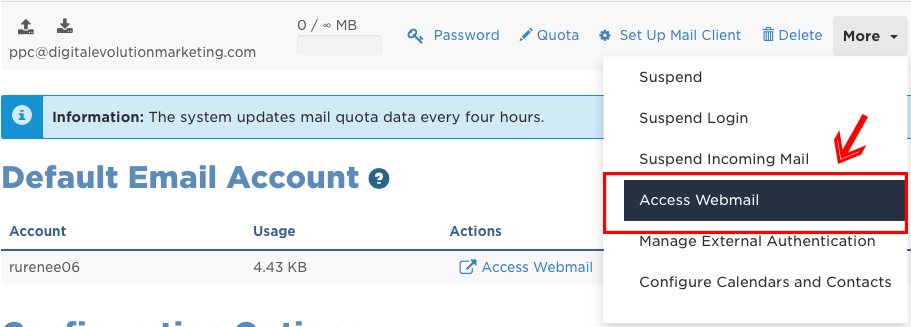
- You will now need to verify this new email with a confirmation email. Go back to the home page of your domain control panel (c-panel). Click on the “Email Accounts” under the “Mail” section. Next to the email address you created, click on “More,” then click on “Access Webmail.”
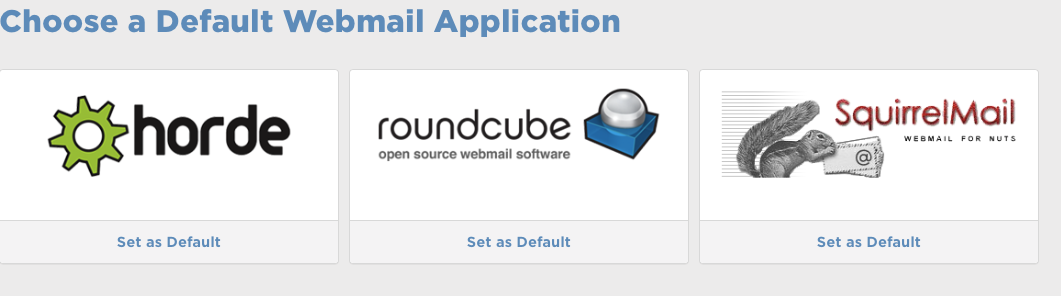
- As you see, on my screen we have three different webmail applications to choose from. It doesn’t matter which one is selected as this will be the only time you will access your domain email this way. One the integration with your Gmail is complete, you will not need to go back to your email through the domain control panel.
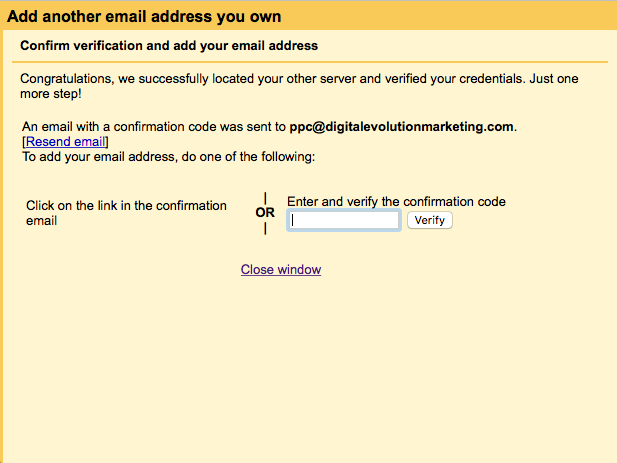
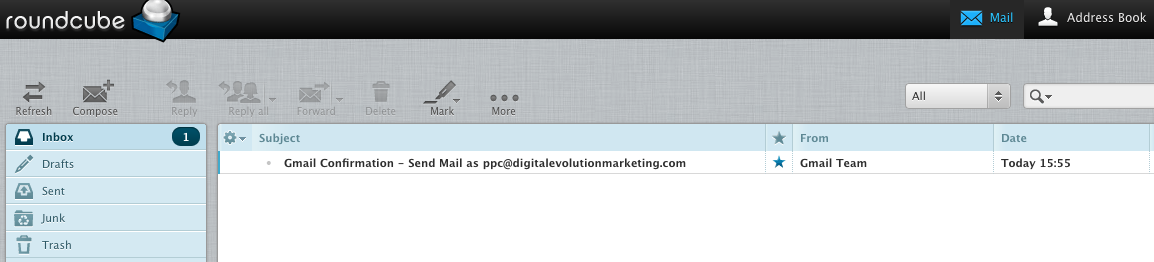
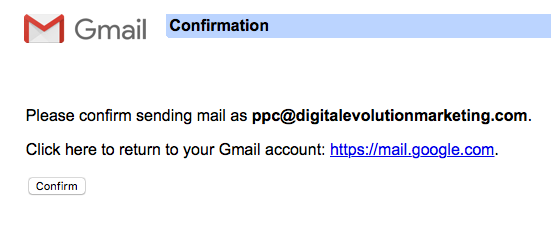
- Once you select the email application of your choice and into the inbox you will received a confirmation email from Gmail. Click on the confirmation link provided.
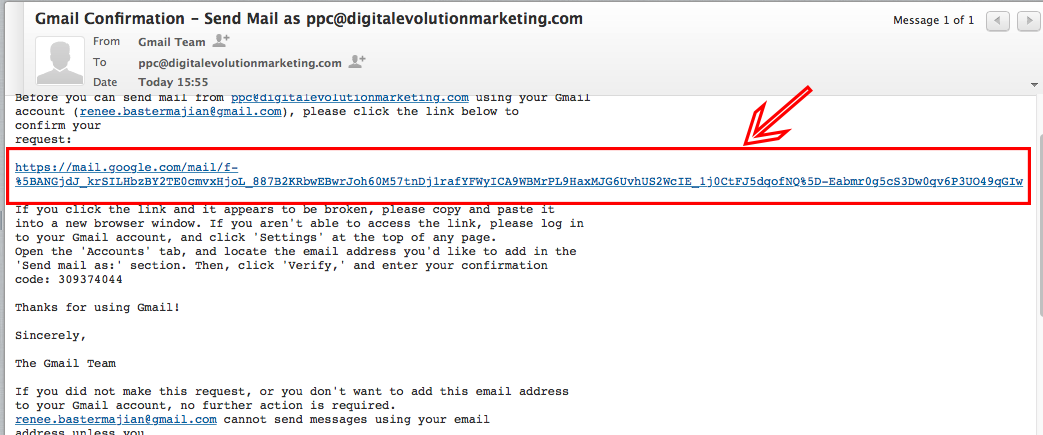
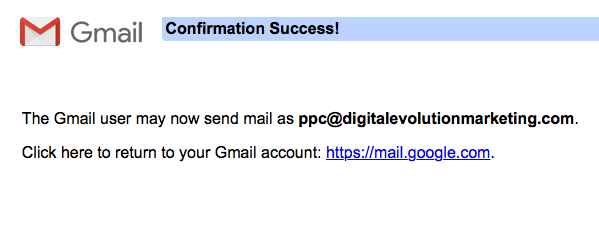
- You will receive a new email from Gmail asking to confirm. Click on the “Confirm” link.
Final Part Of The Domain Email To Gmail Integration
As this point your new domain email to Gmail has been properly set up and added in the “Send Mail As” section under “Tools” – “Settings” – “Accounts and Import.” The last sub-section in “Accounts and Import” that you will need to complete to finish this integration is “Check Mail From Other Accounts.”
“Check Mail From Other Accounts”
Below is the final portion of the domain email to gmail integration.
- Go to “Tools” – “Settings” – “Accounts and Import” – “Check Mail From Other Accounts.”
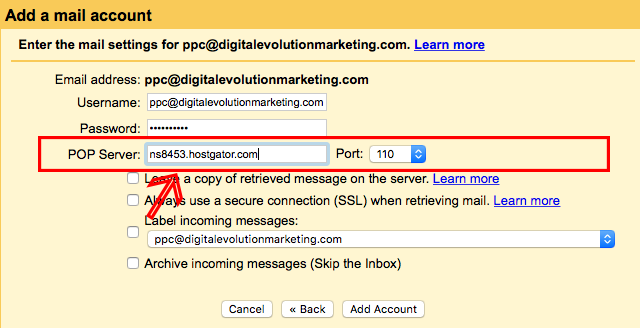
- Click on “Add A Mail Account.”

- Fill out your domain email address, then click “Next.”
- Check the bottom box, “Import Emails From My Other Account.”
- Enter the email address as the “Username” and the “Password” that you set-up earlier under your domain control panel. We will use the same address from step 7 in the previous section for the “POP Server.” Leave the Port to the the default option, “110.” Check the box below that says, “Leave A Copy Of Retrieved Message On The Server.” Click “Add Account.”
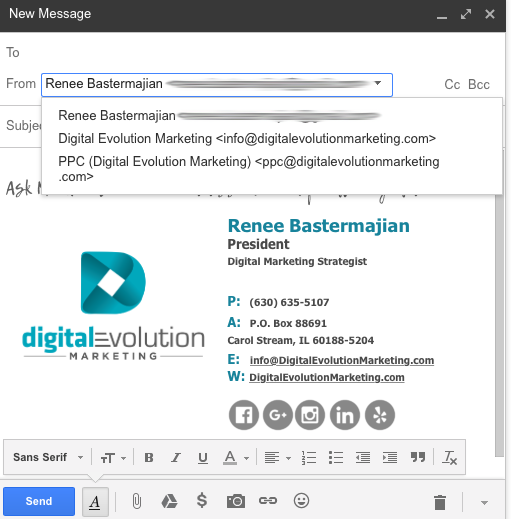
- DONE: you can now send and receive all of your domain’s email to your Gmail address, enjoy!


Pingback: prescription for cialis purchase